

This homemade vegan nutella is packed with nutty hazelnuts, rich chocolate, and is dairy-free, gluten-free, soy-free, and palm oil-free. With just 4 main ingredients (+ salt), it's so easy to make. Spread it on toast, waffles, or fruit!

Want to save this recipe?
Enter your email below and get it sent straight to your inbox. Plus, I'll send you easy and delicious recipes every week!
This vegan Nutella-style hazelnut spread is the version I make when I want the real deal: deep roasted-hazelnut flavor, rich chocolate, and a silky, spreadable texture-without dairy or palm oil. The key is letting the hazelnuts fully turn into nut butter before you add the cocoa and melted chocolate, so the spread tastes intense and doesn't end up gritty.
I started testing homemade Nutella after eating it in Italy, and this is the method I come back to because it's fast (15 minutes) and consistently smooth. Spread it on toast, swirl it into oatmeal, or warm it slightly and drizzle it over fruit.
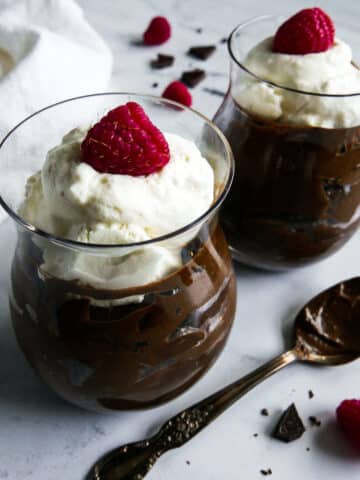
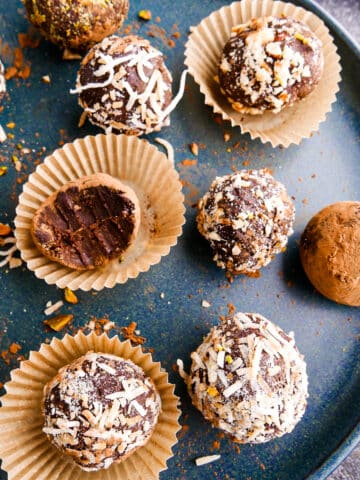
If you're on a vegan chocolate kick, you'll also love my creamy vegan chocolate mousse (it's shockingly silky) and these vegan chocolate truffles (3 ingredients)-both are dairy free, chocolate forward, and feel way fancier than they are.
Jump to:
⭐️ Why This Vegan Nutella Recipe is The Best
- Closest to classic flavor: toasted hazelnuts + real melted dark chocolate
- No dairy, no palm oil (no waxy aftertaste)
- 15 minutes in a food processor, with minimal cleanup
- Easy to customize sweetness, and serve on toast, waffles, pancakes, or fruit
🍫 Ingredient Notes

- Hazelnuts - Make sure that your hazelnuts are both toasted (for a deeper flavor) and cooled before grinding them into a paste. To toast hazelnuts: place on a baking sheet and stick in a preheated 350 degree F. oven for 10 minutes.
- Vegan/dairy-free dark chocolate - I prefer Guittard dark chocolate chips, but you can use your favorite brand of vegan/dairy-free chocolate.
- Unsweetened cocoa powder - Adding cocoa powder intensifies the chocolate flavor.
- Vanilla extract - Adds richer, deeper flavor
📝 Nutella Flavor Variations
- Make it sweeter. For a sweeter spread, add 1 tablespoon of maple syrup (or see my list of the best maple syrup substitutes) to your mixture when blending.
- Orange-chocolate. For a slightly citrus flavor, add ½ teaspoon of orange extract.
- Nuts. Substitute peanuts to make "chocolate-peanut butter spread", almonds to make "chocolate-almond butter spread", etc. There are many delicious flavor combinations!
🥄 How To Make Vegan Nutella
Melt the vegan/dairy free dark chocolate in a saucepan over gently simmering water. Stir until smooth. Remove from heat and let cool for 5 minutes.

Using a food processor, grind the hazelnuts for 8-10 minutes, until it's reached the consistency of smooth nut butter. Add the cocoa powder, vanilla and salt, and continue processing until the mixture is as smooth as possible. Use a rubber spatula to scrape down the sides of bowl.


Add the melted chocolate and blend well. Scrape down sides one more time and blend for another 30 seconds.

Pour into an airtight container. Can be served immediately or stored in the refrigerator for later use.

👩🏼🍳 Expert Tips for the Smoothest Vegan Nutella
- Roast for flavor (don't skip it): Toasting hazelnuts deepens that "real Nutella" taste and helps them blend faster. Let them cool just until they're warm, not cold.
- Get the skins off (as much as you can): Rub warm hazelnuts in a clean towel. A few stubborn bits are fine, but less skin = smoother, less bitter spread.
- Blend until glossy before adding anything else: Hazelnuts go from crumbs to paste to "suddenly smooth". Scrape down the bowl often. If you add cocoa/chocolate too early, it's likely to end up gritty.
- If it's too thick, warm it in the microwave for 30-second intervals, until it's your desired thickness. If it's too runny, it will thicken as it sits (especially after chilling). Give it 30-60 minutes.
- Taste and adjust at the end: Add an extra pinch of salt if needed-it makes the chocolate pop.
- Storage: Store in an airtight container in the refrigerator for up to 2 months.
- How to freeze: Transfer to a freezer-safe container and freeze for up to 3 months. To thaw, place in refrigerator overnight.
🍽️ How to Serve Nutella
- Spread on toast, English muffins, croissants, or warm banana bread.
- Swirl into oatmeal, flax seed pudding, or overnight oats for an instant chocolate-hazelnut upgrade.
- Use as a dip for strawberries, sliced bananas, apples, pretzels, or graham crackers.
- Drizzle over pancakes, waffles, crepes, or vegan ice cream (warm it up for 30 seconds first).
- Spoon into yogurt with granola.
💬 Frequently Asked Questions

Most likely, you haven't blended/ground them long enough. Scrape down the sides with a rubber spatula, and keep going until the mixture is glossy.
Yes, here's the towel-rub trick I use after roasting: place hazelnuts onto a dish towel and roll them around to remove the skins. The skins come off very easily after roasting.
Yes, if it's high speed. Food processors may take longer to achieve the creamy texture.
🍪 More Vegan Chocolate Recipes

Tried this recipe? Please leave a star ⭐️⭐️⭐️⭐️⭐️ rating below and/or a review in the comments section further down the page. You can also stay in touch with me through social media by following me on Instagram, Pinterest, TikTok, and Facebook.
Subscribe to my email newsletter to get a FREE e-book of 15 Healthy Weeknight Recipes, and get new recipes delivered to your inbox every week!

Vegan Nutella Recipe
Equipment
- 1 Food processor
Ingredients
- 12 ounces vegan/dairy-free dark chocolate
- 1 cup hazelnuts, toasted
- 1 Tablespoon unsweetened cocoa powder
- 1 teaspoon vanilla extract
- ½ teaspoon salt
Instructions
- Melt the vegan/dairy free dark chocolate in a saucepan over gently simmering water. Stir until smooth. Remove from heat and let cool for 5 minutes.
- Using a food processor, grind the hazelnuts for 8-10 minutes, until it's reached the consistency of creamy nut butter. Add the cocoa powder, vanilla and salt, and continue processing until the mixture is as smooth as possible. Use a rubber spatula to scrape down the sides of bowl.
- Add the melted chocolate and blend well. Scrape down sides one more time and blend for another 30 seconds. Pour into container with a lid. Can be served immediately or stored in the refrigerator for later use.
Notes
- Storage: Store in an airtight container in the refrigerator for up to 2 months.
- Get the skins off (as much as you can): Rub warm hazelnuts in a clean towel. A few stubborn bits are fine, but less skin = smoother, less bitter spread.
- If it's too thick, warm it in the microwave for 30-second intervals, until it's your desired thickness. If it's too runny, it will thicken as it sits (especially after chilling). Give it 30-60 minutes
- Blend until glossy before adding anything else: Hazelnuts go from crumbs to paste to "suddenly smooth". Scrape down the bowl often. If you add cocoa/chocolate too early, it's likely to end up gritty.

Sharon says
I discovered Nutella on a trip to Italy a few years back, but never thought to make it myself. I love how chocolatey and hazelnuty (is that a word?) this is! I added a tablespoon of maple syrup to make it slightly sweeter and have been eating it with a banana for breakfast all week. I am transported back to Italy every morning! 🙂
Gastronotherapy says
Awww, I love that this Nutella recipe is transporting you back to Italy, Sharon! I also have fond memories of enjoying Nutella in Italy. 🙂 I like to spread mine on toast in the morning, but have also drizzled it on vanilla ice cream when I need a special treat!
Angela says
So delicious! I've made this 4 times now!
MaryAnne says
Thanks, Angela! I'm so glad that it has become a repeat recipe for you! 🙂